Thursday, July 19, 2018

Fusibles - Tile Petal blocks


I'm in the middle of making the tile blocks and want to share my experience with you.  I've used fusible for many years and several different brands.  Years ago, it was a concern with longevity and quality of the fusible.  Will it yellow with age?  Will it some how react with the fabrics it's fused to?  What temperature is optimal for fusing?  Each product is different and will fuse at a different temperature.  I would suggest testing the fusible on scrap fabric to see what your result will be before using on your entire project.  When I was a student in C&G, I did this test.   But, that was many years ago and products have improved.  So, if you're concerned about the outcome, I would do a test first.

These blocks measure 17" and will be trimmed down before they get sewn together.  I'm using fusible web for the pieces appliqued to the background squares.  Following the manufacturers directions for each of the fusible products I am mentioning here with mixed results.  As you can imagine, this uses a lot of product.  I've already used up all my Steam A Seam 2 adhesive, which I said before was a nightmare to work with.  The only advantage is that it's tacky and can be repositioned if you need to move a piece around before fusing.  This product leaves a sticky gummy mess not only on your needle when stitching down, but also behind the applique.  What will this do to the fabric in the long run?  Or, maybe it will wash away....eventually.

In the picture shown above, I have removed the background behind the piece so that there is no show through on the front and as you can see, there is a lot of residue.

After running out of the Steam A Seam 2, I searched my drawers and found some Heat N Bond Lite.  This product is a better choice as it is not as sticky and gummy and pieces can be removed by making a slight scoring on the reverse side of the layers and place a bone tool between to gently un-stick the piece.  Stitching down is also easier but your needle will gum up a bit.  I always keep cotton pads and rubbing alcohol near by to clean off my needle when necessary.


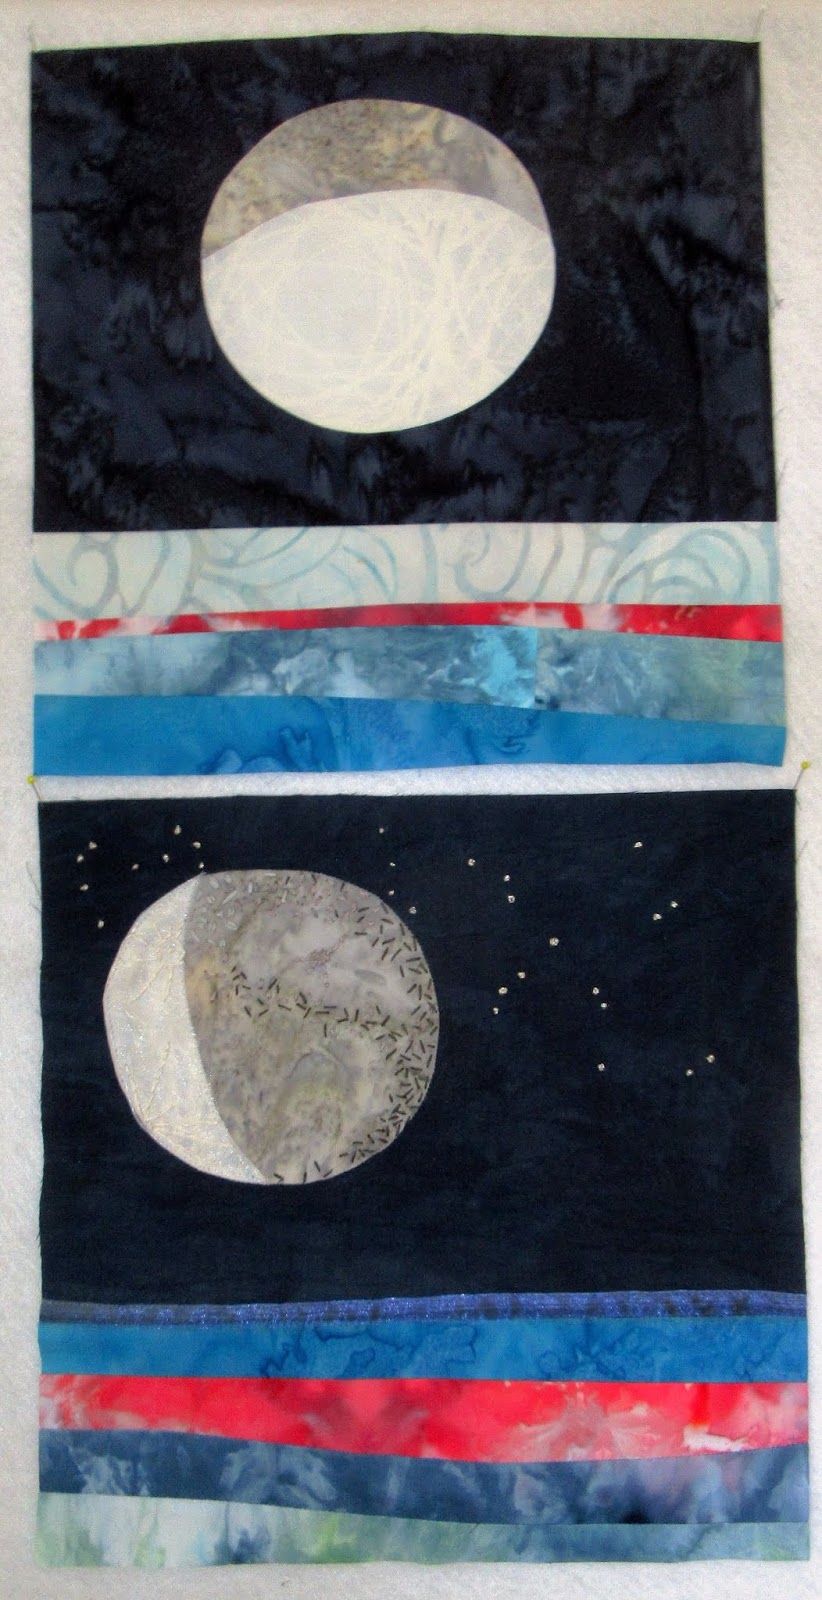
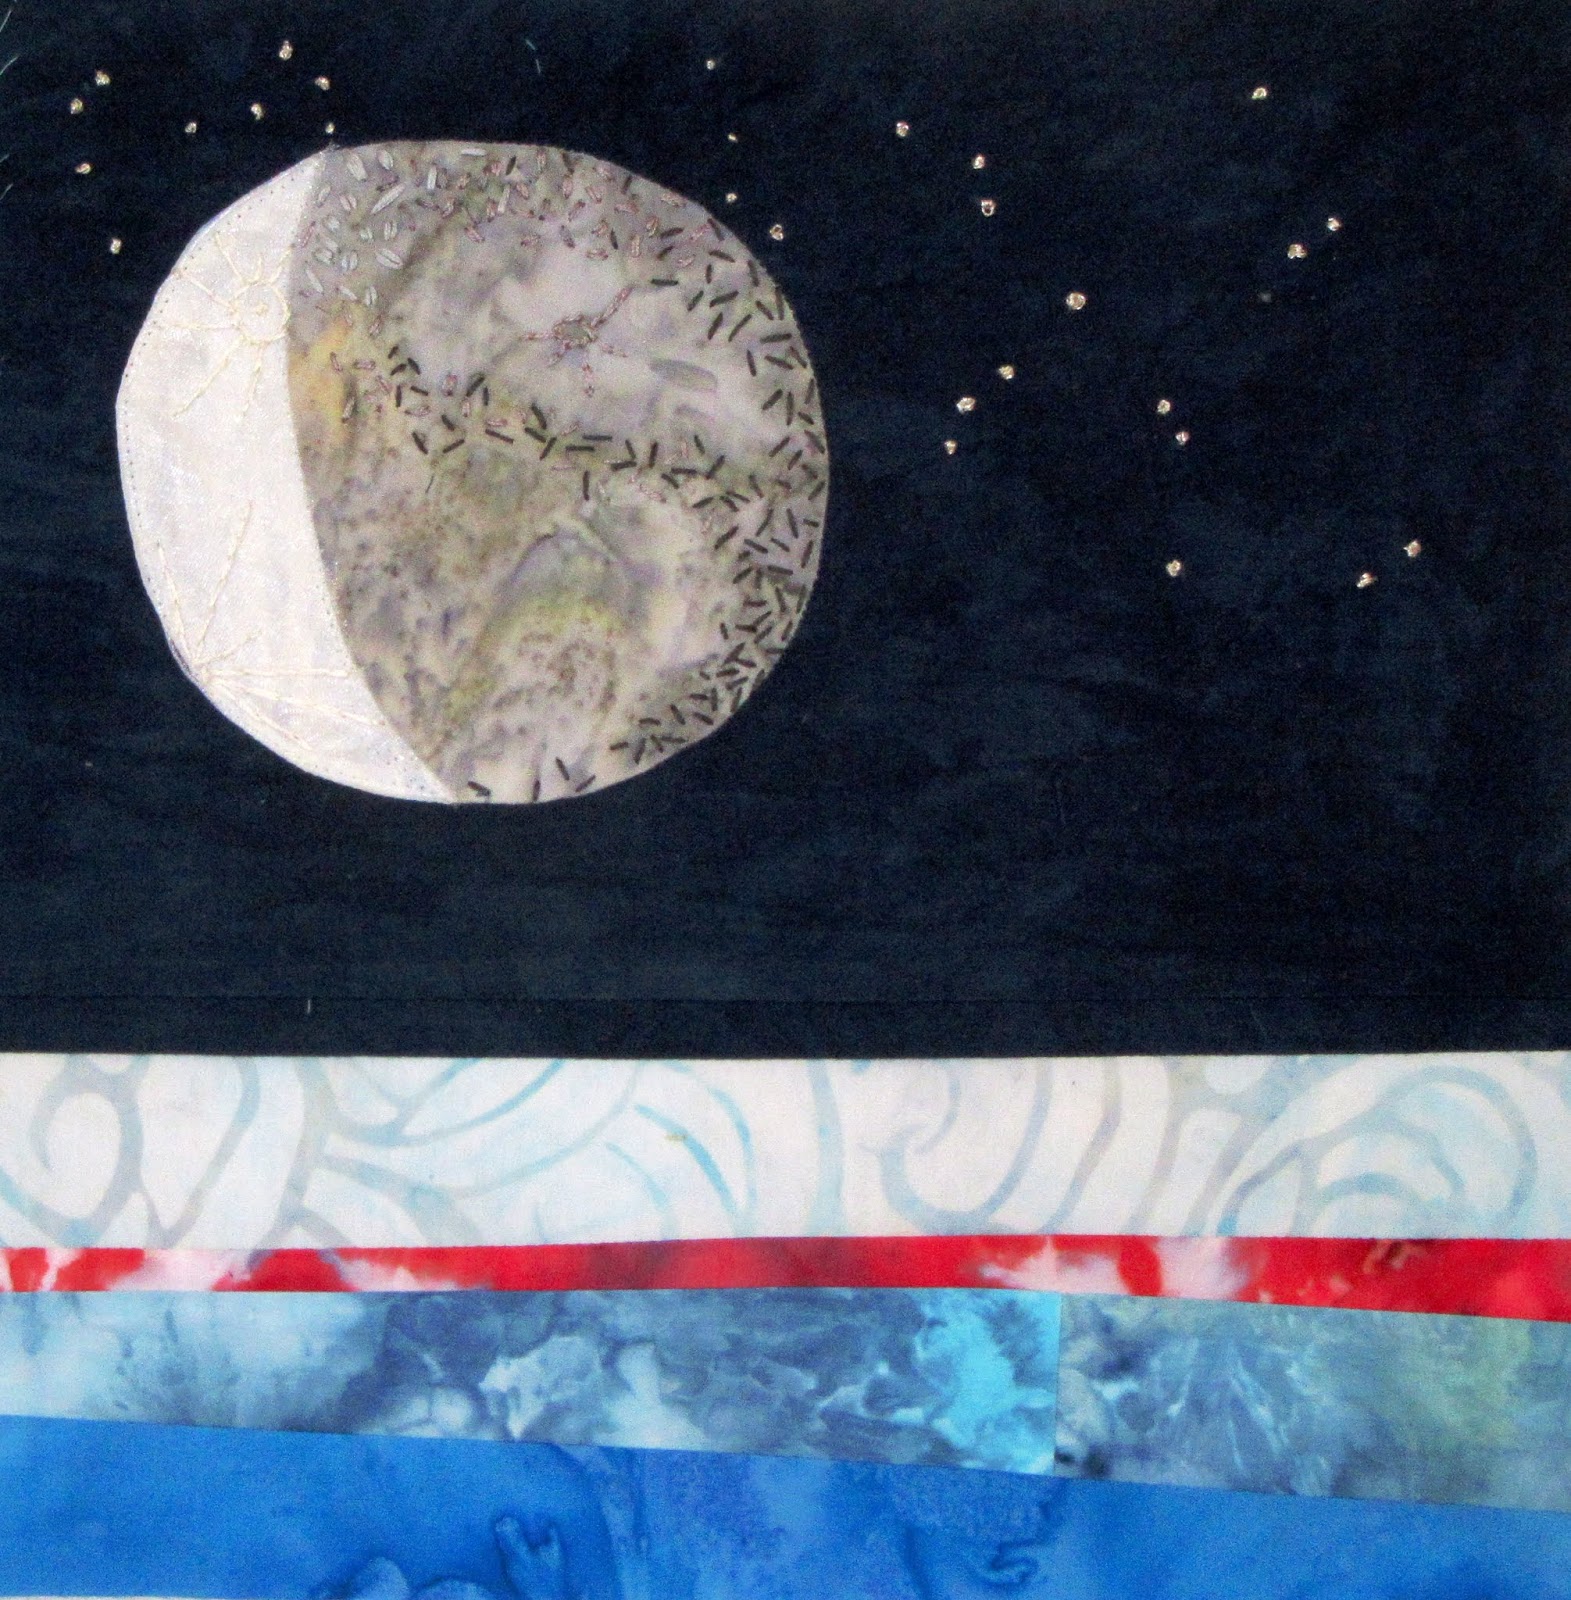
The large circle was showing through the small circle, so I cut away the background and larger circle so that there is only 1 layer of applique in the center instead of 3 and no more show through.


The interfacing product I am using is a fusible interfacing called Totally Stable which is cut the size of the block and ironed on the reverse of the block to prevent any tunneling while blanket stitching the edges of applique.  This is easily torn away after all stitching is complete, but can leave some tiny bits behind.     You can choose to remove all the tiny bits with tweezers, which to me is very tedious and boring or just leave them.  They'll be buried between batting and stitched with quilting on top, so they don't have anywhere to go.   And they are tiny.   My choice is to leave them.
           
It's slow going, but I only have 5 more blocks to make until I can trim them all up and start the next phase which is sewing them together.   Have a great sewing day.  :o)

Sunday, July 15, 2018

Summer Strawberries

This picture has nothing to do with what I am posting about, I just like this one my son took of an outdoor sculpture of a "jack" at our local library.  A few years ago, I would take a lot of pictures of food I would make, but I've gotten away from doing that.

I look forward to every summer season and all it brings, especially when strawberries ripen and I can go to a pick-your-own farm to get them fresh.  Usually I make jam, strawberry shortcakes, strawberry ice cream, or just eat them plain or with cereal.  They're even better dipped in chocolate for a simple dessert or chopping them up and adding them to oatmeal or on top of waffles.  Recently, I've discovered a new recipe.  It's light and refreshing "strawberry soup" served very cold in a bowl at breakfast as a fruit course.  Similar to a smoothie, but different and should be served in a chilled bowl with a spoon.

Strawberry Soup

1 pint strawberries, cleaned and hulled
1/4 cup sugar
2 Tbsp. fresh lemon juice or orange juice

In a saucepan combine the above ingredients and heat over medium heat, stirring occasionally until sugar is dissolved.  With a stick blender, whiz until smooth, let cool completely and then continue with the rest of the ingredients.

4 oz. plain or strawberry yogurt
1/2 cup half and half, or 2% milk, or if you like, cream
 Whipped cream for garnish (optional)

Add the next two ingredients, mixing in well and chill until very cold, at least 4 hours.  When ready to serve, ladle about 1/2 cup into chilled bowls or parfait dishes and top with a dollop of whipped cream.

I hope you will try this recipe and will like it.  If you don't like milk or yogurt or have an allergy, you could try a substitute.  I have not done that, so I don't know what the outcome would be.  If you do substitute, I would be interested to know if it worked so please leave me a comment.   Have a berry great summer!

Monday, July 9, 2018

Petal Tile Blocks

I am still working on my Petal Tile quilt blocks.  This block was taken from the book, "Tile Quilt Revival" by Carol Gilham Jones & Bobbi Finley.   The instruction in the book had templates for a 10" version and you are suppose to increase the size by 150% on a photo copier.  Well, I didn't have the time or patience to run up to my local copy store, so I just took some paper, taped it together to measure 17" square and started drawing out the shape.  It's not perfect, and that's what I like.
You applique each petal working from the center out by either needle turn applique or fusible applique technique.  As I stated above, I have little patience and time, so I am using fusible.  My machine is set on blanket stitch and I am using "Totally Stable" on the under side of my background to prevent tunneling.  I mentioned before that "Steam-a-Seam 2" is the product I used on the first 5 blocks, but it is gumming up my needle so bad that I am switching to "Heat-n-Bond Lite" along with the stabilizer.  After deciding which technique to use, place the template upside down in a window or on a light box and draw out your pieces onto the fusible paper side if using.  

 If you're using the needle turn method, use freezer paper to draw out each piece and when you cut them, be sure to add about an 1/8" seam allowance to each petal.  This will give you the "grout" between each piece.  Number each petal so you know where they will be placed on the block.  


Making the blocks in stages keeps me from getting too bored with one process at a time.  The top set of 5 are completely finished except for the trimming.  The second set of 5 are ready to blanket stitch.  The third set will have 6 blocks, then I will trim them to 15.5" when all are completed.  I haven't decided about adding a border yet, but I know I will not be set with sashing strips.  I want the quilt to measure 80"X80" when finished.  

All the fabrics I'm using are from my stash and I place each color family in their own pile and whatever looks good to me is what goes into each block.  Some of the fabrics and color families will have to be repeated.  After seeing most of them done, I am getting excited to carry it through to completion.  After these blocks are put together, I think my machine will need a well deserved "vacation" at the local Bernina store to get cleaned and serviced, it has been a while.  


Thursday, July 5, 2018

NQM - BOM the first 4 blocks

The National Quilt Museum in Paducah Kentucky put out a call to quilters to join their Block of the Month challenge to start with the April 2018 block.  It is a free challenge which will teach quilters a new technique every month for a year.  By April 2019, the final block will be revealed and quilters will finish their quilts to see if they qualify for the first 1,000 finished to receive a special label to place on their quilt.

I am trying for this accomplishment and following the instructions as closely as I can.

For the April block, Mr. Domestic, aka Mathew Boudreaux, gave us directions for "Bow Ties" using either English Paper Piecing technique or an easy Machine technique.  I chose to do EPP by hand.
I love the way this block turned out, it looks like bathroom tile to me.  The center squares on point are hand dyed fabric and the others are commercially dyed batiks.  

For the May block, Regina V. Benson, was the chosen artist to make a block using hand dyed fabrics we created.  The block should contain an organic element like earth, fire, sound, or water motifs using abstract composition, curved shapes, and asymmetrical layering in improvised piecing.  Her work is astounding and can be found here.  
I chose to ice dye my fabrics and scissor cut them into strips and chunks sewing them together to look like water and reeds.  

In June, the block to create was inspired by the Japanese Quilt Artists exhibit at the Museum.  We were to create a block from a sample block they provided including a pieced background, an applique Mt. Fuji and some embroidery embellishments.  I loved this block's elements.

For the July block, the exhibit "Fly Me To the Moon" is on display, so we were to create a block from the sample block provided with a moon motif that is pieced by machine using Annabel Wrigley's technique.  Adding a 3.5" atmosphere motif that is ruler-free rotary cut into strips and sewn into a stripe set at the bottom.
All the blocks are trimmed to 10.5".  You can find out more about the BOM club challenge here.

So far I am enjoying this challenge.  But,when I finished the moon block, I was not completely happy with it.  The moon was a little wonky and the stripes were not quite like I wanted them to look, so I created a second attempt.
I like the stripe set better on this second one, but the moon is the wrong size, so I cannot use it.  In my attempt to make a perfect circle, I didn't measure my circle right at the onset.  UGH.  I may chop off the bottom atmosphere and replace it with the first moon block's atmosphere set.

After writing this, I went to work chopping off both strip sets and switched them.  I am happy with the results and will go with the embroidered moon block even if it is a little wonky.  The second block will go in my orphan block bin.

Here it is and  now, I'm happy with it.  I'm anticipating the next month's challenge and hope it will be just as interesting as these first 4.


Catherine's Wheel

 I posted December 17, 2020 about making an ornament which is called prairie wheel (USA) or Catherine's Wheel (UK).  The latter being of...