Friday, September 25, 2015

Portrait quilts


In my last post, I mentioned a surprize for a friend of mine.   I started working on it right away and want to share the process with you.  First off, use a picture with good composition with few details as it will be easier to convert.  I use photo editing software to convert color photos to black and white and posterize the image which will give you 3-4 shaded areas where contrast is high on the subjects features.  When I made this green challenge quilt, I used close up pictures of my DH, DS and myself.   The challenge was to create a quilt measuring 6" X 24" with greens and muslin/calico.  The picture to the left looks pink, but I assure you it's muslin and not good lighting for this photo.   This was an odd size and for most of the participants, the challenge turned into table runners.  For me, I wanted something that would hang in a tight space and try out the portrait technique. 

Getting back to my friend, she is a proud Grandmother and doesn't get the chance to see her son's family as much as she would like as they live out of state.   She sent this picture and I just couldn't resist in trying the portrait technique again. 
So, like I said the first thing to do is to turn it into a black and white photo. 
Then, using photo editing software you posterize it.  If you have patience and a great photo software program, play with the image to get it the way you want it.  You could turn it into a real work of art.  You will be able to edit, save, change or even delete several files until you get the one you like.  Choose what colors you want to use at this point. 

Sketch drawing
Color Posterized photo
Slightly  Posterized
Posterized to show zones of contrast


The next step is to print to your paper.  I wanted to keep it small, but you could make a huge quilt from the printed image.  I also drew out the image onto freezer paper so that the image wouldn't be reversed when fused and appliqued onto the background. 
 
 
You can see my sketch on the freezer paper above.  Fuse the steam a seam or other light weight bondable product to the back side of your fabrics.  Cut the freezer shapes out and fuse onto the right side of your fabric and use a teflon sheet underneath where the fusible is.  You don't want to fuse it onto your ironing board.  Then you carefully cut each piece and layer it onto the background.  Choose what should go down first.  In my case, white was the most prominent fabric used.  Then gray and finally just a few black contrast pieces.  Carefully iron the shapes in place.  Check to make sure they are placed correctly, again you don't want to fuse the shapes onto the ironing board or the bottom of your iron.  Why do I keep stressing this....experience!  I've been there and done that before. 


When you have it fused and ready to go, pin it on your design board and step back.   How does it look, make any changes now before you start your stitching.  I made a few changes at this stage.  The babies head didn't look right to me and the hat looked cut off on the very top. 
Now you can choose your stitching technique and threads.  I used monopoly thread in the top and bottom and zig zagged around each shape.  Take your time, it's not a race, put some music on and enjoy the process.
 
 
Yes, I'm old so I have to use my magnifyer when I sew small spaces.  When you've completed this step put it back on your design board and take a picture.  Now, layer your batting and backing and pin or baste together.  Quilt inside your shapes first saving the background for last.  I find this to be easier as you assign zones and keep your mind straight on what is to be done and where.   So, here I started quilting the white areas on the faces.  Leaving all the contrast alone.  I used white to blend.  On the background, I used gray thread lines to bring out the brick pattern. 
 
 
Now you're ready to trim, add the binding and finish the quilt.  I went back and fixed a spot on the hat and removed the gray contrast piece on the babies head.  Don't forget to add a label to the back.  The finished size is 9" X 11" with a label on the reverse stating who is in the picture, who made the quilt, date and who it is for. 


Now I want to do another one.  I have the coolest picture of my Dad when he was 17 years old.  I am thinking of sticking to the black, white and gray look.  But, I may change my mind as I very rarely do something the same way twice. 


Monday, September 21, 2015

Catching Up after the move...

I finished 6 placemats in time for a luncheon here in my new house.  Ladies I hadn't seen in nearly 20 years came over to share stories, quilts, laughs and of course, food!
I also finished up my friend Julie's quilt top.  We had started this strip applique quilt about 4 years ago.  The pattern is from the book, "Tile Quilt Revival" by Carol Gilham Jones & Bobbi Finley. 
This pear shaped pin cushion I made with different samples of green fabrics I got from a friend.  It has a home on top of my design board. 

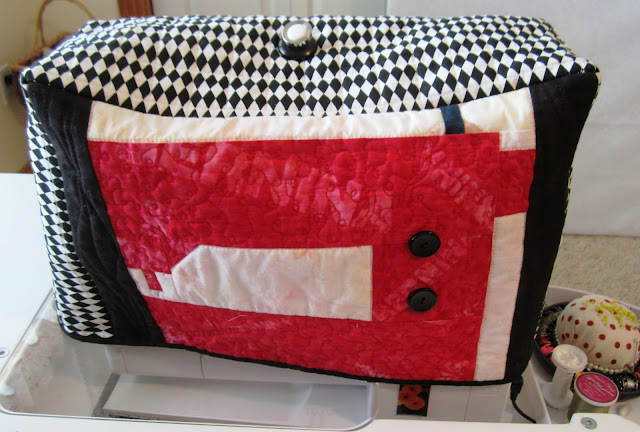
My Bernina decided to give me trouble, so I put its cover on and unplugged it for now.  I went out and bought a cheap Brother machine.  It's a good idea to have a back up anyway and this one is a decent machine that I will use from time to time.  It has already been put to use with over 1,000 stitches sewn.  The Bernina has nearly 3 Million on its counter in just over 2 years of use.  Maybe it decided it needed a break. 

Now, I am on to the next project.  It's a surprise for a dear friend I've had for over 34 years.  I will have to keep it a secret until later and will post about it when I send it to her.

Exploring our new surroundings and getting used to an entirely different climate.  My skin is extremely dry and cracked and we're not even into the winter months!  For now, I'm ready to do sketches for "the surprise".  Shh....

Sunday, March 1, 2015

Improv quilt

Just over a year ago, I searched for Modern Quilter groups online.  I found one and read about a talented author in need of test quilters.  Always wanting to challenge myself and learn new techniques, I got in touch with Sherri Lynn Wood. I was expecting her to turn me down to try the instructions out as I had contacted her after the deadline.  But she didn't, and promptly sent me all I needed to get started on the process.  All test quilters were given a few instructions she calls "scores" like in a musical score.  The whole process fit in to my way of creating, no patterns, no pictures and freedom.  The first thing I did after receiving my score was to put on some classical music which helped me to relax and let the creative juices flow.  
 
Once I got going on it, I didn't stop until it was finished.  This is unusual for me as I have basket loads of UFO's needing the finishing touches or are at different stages of completion. 
My quilt was not chosen to be in the book, but I wasn't even expecting to be able to test the score at all.  So, I am very happy with the outcome and I can't wait to try out all the scores in her new book,
"The Improv Handbook for Modern Quilters", by Sherri Lynn Wood. 

My finished quilt is a small wall hanging measuring 29" square.
My interpretation of the Rhymthic grid score described in Sherri Lynn Wood's new book The Improv Handbook.

Close up of the test quilt which I have named, "Garden Ladder".  I used quilting pattern lines and one intersecting grid in one section. 

Monday, January 12, 2015

Clean the Slate (Wipe Board)


Claddagh Ring Applique class

I keep a wipe board and a large pin-up board in my studio where I constantly add projects to the list or drop projects as and when they are completed.   I also keep a journal of the ongoing ones so if I have to set them aside I can refer back to my notes/journal and refresh my memory on the initial direction taken.  This is a tremendous help to me as I have too many UFO's and ideas for new projects.  Also on my bookshelf are 6 large 3-ring binders full of patterns, ideas, information, clippings and techniques to try for future indeavours.  When I get stuck for what to do next or need some information, this is the first place I start looking. 

Metallic Thread Class

The Internet is good if I have a large block of time to spend, but that doesn't happen too often.  I tend to be old-school and on the less technical side of life.  I like it that way, it gives me time to breathe and expand my mind, troubleshooting a problem and making things suit the need, rather than going directly to a factory made pattern followed to the tee.   This has always been my process and I find it funny that the newbies to the  quilting scene  call it "MODERN".  Having said that, and I hope I didn't offend anyone here, it is not intentional, I am a member of a MODERN quilt guild and quite like it, however it is not a new or Modern concept.  But, if you had to put a name to the different paths of processes, I suppose MODERN is as good a name as any.  

Garden Ladder Inprovisational wall-hanging
 
I would consider myself an Improvisational Modern Quilter and have always been right from the very start.  My first ever quilt teacher was not impressed with my way of doing things, and I can't really blame her afterall, but it is just my nature, again, not intentional.  I did learn a lot from that class and hundreds of books and classes afterwards. 

Thread Class scissor case and needle book

I am a hands on person and make mistakes even now some 32 years later, but those mistakes turn out to be mostly pleasant surprizes. 

Slider Puzzle wall-hanging

By the way, all these quilts/projects were completed in 2014 from my UFO pile.  There are a few more, but I just wanted to share some of them.   Let's see what can be accomplished in this New Year?!  Happy Quilting.... ;o) 


Labeling Quilts

  It's sometimes an afterthought to add the label after completing the quilt.  Most times, sadly, it's never added and the informati...