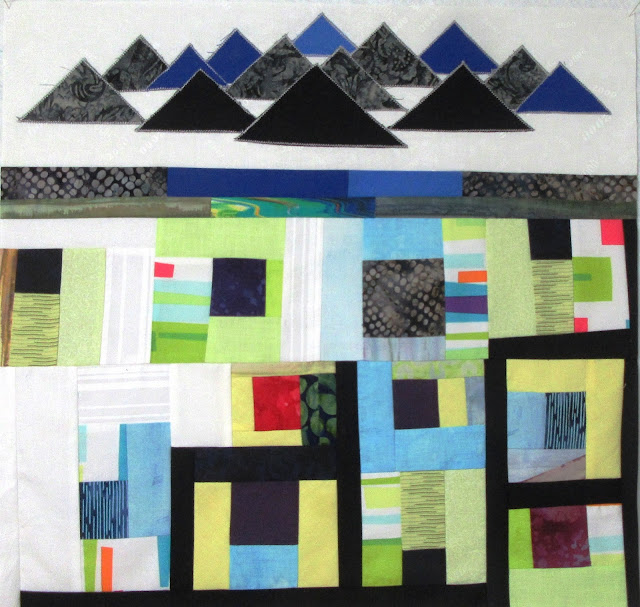
Working from the top, I broke the elements down into sections to sew. The first section was the mountain range on a white background. I will thread paint the snow caps before sandwiching together, but to apply them onto the background, I used glue stick, used dryer sheets for stabilizers, and machine applique techniques. Layering from furthest to closest, I sewed down the furthest mountain using a zigzag stitch, then laid down the next mountain until finally the closest mountain was stitched. They look like they are floating in the air, which is fine to me, they look this way sometimes when the weather is foggy or snowy.
The next section was the grassy/water section. There are valleys and meadows with reservoirs and lakes around. I sewed these strips together in a staggered fashion so no seams would match.
The hardest section was the bottom section which represents the city and streets. The solid strips break up the city blocks. I moved these pieces around quite a bit until I was pleased with the layout, then sewed them into row/blocks.
Again, trying not to match any seam sections so that it can look as scrappy as possible. These sections were sewn together then, squared up with a rotary cutter. Now, I am contemplating the quilting and backing. I will not bind the quilt traditionally as I don't want a bound edge even if it were pieced to match the different colored edges. I will sew using the pillowcase method, then quilt the top. For now, it's hanging on my design board. My DH is patiently waiting for the outcome and I hope to have it ready by his Birthday in a month. This piece measures 24" almost square and will hang in his work place. It looks similar to the other improv pieces I've done and I would say I've exhausted this technique and want to move onto other techniques.
DS is coming in today so we can spend time together. It will be so nice to have him stay with us. He is wanting me to finish the Blue Sapphire quilt so he can hang it in his place. Since my foot has been bothering me, I haven't done much sewing/quilting in the past 3 or 4 days. Seems longer, but I know I should rest it. :o)


.jpg)
No comments:
Post a Comment