Saturday, April 14, 2018

Turning Vintage Feed Sack scrap to Dresden Plate blocks

String piece the tumbler shaped pieces with RST along the wide edge, then fold to RSO and press to make a point.  

Last month, I attended a quilt guild meeting in my area for the first time.  It started off in the normal way with the business being taken care of so that the evening's program and speaker could take over the majority of the time.  On this night, the topic was flour/feed sacks.  I knew what they were, have seen only a few and knew they were used for not only the product intended, but also was an advertising and promotional tool as well as an upcycle textile for home uses.  Like making dresses for children, toys, pot holders for the kitchen, and all sorts.  They also purposely printed patterns for the homemaker to use after the feed and flour were used, sometimes being a dresser scarf or child's romper, even quilt patterns.  The promotions meant having to purchase more product to get the next step, block, or set of patterns to complete the entire set.
With RST, sew each petal along one edge until all 12 petals form a circle. Center onto the background square and pin.  

I learned so much about the age of these printed gems.  Our speaker's mother had compiled years, no, decades of samples which were published in a comprehensive book that has been accepted in the Library of Congress.  Quite an impressive task. 
Baste the petals onto the background to hold in place.  Applique by hand  and remove basting stitching.  

At the end of her talk she had a table filled with vintage pieces of calico feed sacks.  Of course, I had to purchase some.  So, now what to do with these small vintage scraps I've purchased?  Something vintage looking, like Dresden Plate.
In the final step, the center circle is appliqued in the center through all layers.   I have not done any of the appliqueing yet, so these pictures do not show the final block.

This square is 6" when finished.  I purchased the instruction book and template set a few years ago, but this is the first time I've used them.  The last time I tackled a Dresden Plate block was 35 years ago when I attended my first quilting class.  That was a time when templates were cut from cardboard and drawn out with a ruler.


Tuesday, April 10, 2018

Unconventional Pixels


After a long respite, I've been busy in my studio working on an Improvisational wall quilt for my son.
As soon as I started on piecing the top, I knew what the name of the quilt would be. "Unconventional Pixels".  A lot of my quilts are that way.  It doesn't take long before a clever name comes to mind.  This one is definitely "Unconventional" in every way. 

The strips were cut with scissors in varying widths and sewn together in their color categories which were lights, mediums and darks.  This generated 3 pieced sets which were cross cut with scissors into varying widths again.   My rulers went on vacation during the construction of this quilt. 

At first, I thought about putting them in a basket and blind pick each strip to sew to make blocks.  But, then I decided to piece them log cabin style.  Using the same light and dark concept, I chose the light blue and black fabric to space the blocks and make some of them float.  


My son is a film fanatic, so with this in mind, I wanted to add side strips that resembled frames from film.  I used the light blue with dark blue squares for one side and black with gold squares for the other side. Next, I sandwiched the top with the backing and batting using safety pins to hold the layers together while machine quilting the design.  I usually undo the pins about 6-10" in front of the needle so I am not running any of them over.
There is a sense of flow with the light and dark sweeping across the top.  This thought led me to decide the quilting design.  I rarely mark the top.  I love the random free motion doodling techniques.  I chose to make wavy intersecting lines.  I like to look of polyester and rayon thread with it's glossy sheen. The use of polyester is very unconventional these days.  The top and bottom thread is Superior's Fantastico thread in a slight variegated navy blue.  

Instead of adding a binding to the edges, I wanted the quilting to flow off the quilt and not end that look with the binding or looking like it was framed by the binding.  I thought of purchasing some wood slats to make a frame like a canvas and stretch the quilt around it, but I didn't want it to look heavy and bulky, so I decided to just roll the edges to the back and sew  them down to the back.  Perfectly "Unconventional".
Here it is, finished and ready for him to hang in his foyer which will bring lots of color to his bare wall.

Wednesday, September 20, 2017

Tea Bag Art

When I got my issue of Quilting Arts Magazine June/July 2017,  I was interested in trying out the tea bag thread painting technique.
 I apologize for the odd colors in my photos.
 At first, of course, it was easy...make a pot of tea using tea bags and save them.   I dried them and emptied out the tea by making a small hole at the bottom of the bags.  

 I cut a small piece of muslin to fit inside the bag, this helps stabilize the paper bag and sews your design easier.

Using watered down white glue like "Elmer's" or PVA glue and a cotton swab, I painted the cut edge closed and let it dry.

Next, I cut bits from my scrap bag and placed them on using a dab of glue just to hold them in place to sew over.  I wouldn't suggest using an elaborate design with too many pieces and elements as the size of the tea bags restricts your design and too much sewing will tear up the bags.

Once you've sewn down all the elements, paint the entire surface with the thinned glue and let dry completely.  You will be able to sew the entire bag onto a larger piece once it has dried.  

 This technique is strictly for items you are not going to put through the wash.   I made magnets out of these using those annoying advertisement magnets that come in the post.  Why throw them away?  I cut them to size and glued them onto the back.

 Using them as an applique,  I made 2 eyeglass cases for my sunglasses as well.  This project was strictly an experiment and I don't expect these to last forever because they are just paper, but I like them and if I can be careful with the use, they will last a while.  Applying a couple thin coats of the glue wash helps in preserving the integrity and dries clear.   I used a fine pigma pen to write on the tea bags.

Wednesday, September 6, 2017

A Tiny Project

I'm sorry I have not posted anything in months.  It's been a crazy summer, but I have not been idle.   I've made some kennel quilts for the displaced pets and dropped items below for World Art drop day which was yesterday and by the way, it is held every year on the first Tuesday in September.  You can go on social media to see more about it or search in your area for more details.

The two mug rugs on the left are paper pieced.  The crochet table mat was a little tricky as you work 2 separate ovals and a square, then weave them and sew together.  And the tea bag magnet at the top is a project I want to post about another time.  These were all the items I did for World Art drop day yesterday.  Whomever found these items, I hope they will like them.

This picture was taken after I cut out the pieces for the mug rug and cozy

Years ago I experimented with tea dying fabric.  So, I wanted to try this technique again with an old canvas tote bag I had.   It was plain, stained and should have been thrown away, but I thought why not tea dye it, experiment with block printing and see if I can make something out of it.  Not worried about ruining it, I went head long into making something out of this horrible piece of fabric.  I cut the handles off and the side seams making it one long piece.   Next, I made a huge pot of tea using 8 black tea blend bags to about 3 cups of water. Steep for around 15 minutes or so, then added the fabric piece and left to cool.  An hour or two later I wrung out, rinse, wrung and rinsed again.  Wrung a final time and let line dry.  Once dry, I ironed the fabric without starch sizing and was ready to add paint, stenciling and block printing.  I used textile paints, let dry and ironed a final time.  It looks blotchy, but I like it, so moving on, I made a mug rug and mug cozy from this tea dyed canvas and like the result very much.  DH uses these in his office.

 Mug Cozy
This is the reverse side.  Fabric for the reverse is a commercial batik cotton fabric.
Mug Rug
Mug Rug reverse side
DH favorite tea break
Colouricious is where I have found print blocks, textile paints and tons of inspiration.
Now, what to do with the rest of this canvas?  Maybe a bag and add some stitching and beading?  We'll see.

Thursday, April 6, 2017

Soup and Chocolate - Ultimate comfort foods


It's April, and we woke up to a blanket of snow.  I haven't blogged about food in a long while.  With the weather being so unpredictable, I thought the best comfort for today has got to be a nice pot of soup and for dessert, what's better than a warm cup of Italian hot chocolate?  There is a cookbook in my collection that I truly love and use more often than any other.   I bought it from a bookshop in the UK about 6 years ago.  It's called, "New Covent Garden Food Co. - A Soup for Every Day".  When I purchased it I had no idea how good and valuable these recipes would be.    Today I made Celery, Potato and Mature Cheddar Cheese soup. It's amazing and like most all soups, it's extremely easy to make.


Celery, Potato & Mature Cheddar Cheese Soup
Serves 4-6
Ingredients:
50g. (3Tbsp) unsalted butter
1 medium onion, finely chopped
1 large head of celery, finely chopped (I only had 4 stalks left in my produce drawer)
450g. (2 large) potatoes, peeled and sliced (I used 3 large russets to use up what I had on hand)
725 ml. (about 3 cups) chicken stock (I used vegetable stock)
750 ml (3 cups). double cream (I used 1 cup of 1% milk)
To Garnish:
50g. (2-3 Tbsp) mature cheddar cheese, grated (I omitted the cheese)

Melt the butter in a soup pot, add vegetables and cover.  Cook gently for 10 minutes without browning.
Add the stock, season well.  Cover and bring to a boil.  Simmer gently for 30 minutes or until the vegetables are tender.
Blend 1/2 the soup finely with a stick blender and the other half blend coarse.
Return the soup to the pan, stir in the cream (or milk) and season to taste.  Reheat and serve with grated cheese.

I am watching the Masters Golf tournament this week.  Most of the time people talk about the awesome fare offered at the Masters and how cheap it is.   For decades, they've hand made their egg salad and pimento cheese sandwiches for $1.50 each.  These are easy to make and satisfying in that southern climate along with lemonade or iced tea (sweet tea if you're southern).  For me, the sandwich has got to be cut into quarters and served with hot English tea.    I know, you can't take the Brit out of me.


Egg Salad

6 hard cooked eggs, diced finely
1 Tbsp. fresh chives, chopped
1 tsp. dried dill weed
1 stalk celery, diced
salt and ground pepper to taste
3-4 Tbsp. Mayonnaise (I use light mayo)
1 tsp. stone ground prepared mustard or Dijon mustard
Whole Wheat or White sandwich bread (I use Delightful Multi-grain light loaf by Sara Lee)

In a small bowl, combine all ingredients and mix well.  Spread about 2-3 Tbsp. onto 1 slice of bread. Top with a plain slice of bread and cut into quarters, maybe even cut the crusts off?  Not me.

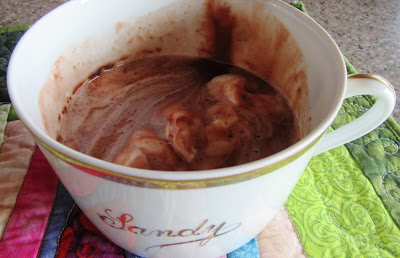
As I mentioned above, I love English tea, but sometimes I gotta have a cup of coffee.  Italian coffee is superior to me.  They really know what they are doing.  Who doesn't love Espresso or Cappuccino?   I've started to find Illy and Lavazza coffee in my supermarket, but you can find them online.  The smooth, not bitter taste is not like almost every national brand and I love it with a bit of foamy milk.   Sidetracked...anyway, one day I purchased a can of Illy and it came with a free box of Italian hot chocolate.  It's thick, rich chocolaty taste just brought back memories of sitting in a cafe I used to frequent where I had a chocolate taster tray for dessert once.  Yes, only once, darn it!   On it was a small demitasse of hot chocolate along with a selection of chocolate pastries and confections.   When I tried the hot chocolate, it was like having a rich dark chocolate bar melted in a cup.   As you can tell, memorable and worth trying if you should ever come across it.  Here, my cup of hot chocolate is topped with a little whipped cream and cinnamon.  Oh yes I did!


Well, enough about food, it's time to get back in the studio.  I'm finishing up kennel quilts to mail off next week.  Then, it will be time again to clean up the studio and update my UFO list.   :o)

Friday, March 31, 2017

Inspiring air and space museum

 Just a little inspiration from a recent visit of the Air and Space Museum at Petersen Air base, Colorado Springs...
The terminal was built in 1941 and was Colorado Springs first airport terminal.  It has stylized eagle entryway and art deco architectural detailed features. 


Adjacent to the air base is this structure..."Airplane Restaurant"  Covering the walls, nooks, crannies from the ceiling to floor are artifacts of flight, signed photographs and amazing history.   You can be served on the plane in retrofitted booths.  

Interesting shots taken by my DS.  This museum had artifacts from WWII to the Cold War.  The evolution of flight and communications was interesting.  In the Broadmoor hangar, you will find displays, a fighter, and a test simulator for airmen going to missile silo duty. 
In the Broadmoor Hangar...
Test Simulator
EB-57E Canberra

EC-121T Warning Star or Conny as they call it.  This was a flying radar ship that tracked enemies and directed our fighting resources.  
CF-188A Hornet


You can visit this link to find out more information on the Peterson Museum


Sunday, March 19, 2017

Colorado Improv quilt

I started out with a basket full of scraps.  I dumped it out on my studio floor and sorted them by color and by solids, setting the solids aside.   Seeing the strips and squares I had, I decided to make a scrappy improv quilt for my DH with Colorado as my inspiration.  He has a view of the mountains on his way to work everyday along with the lights of the city and freeways surrounding the area.  Crudely, I drew out an outline sketch of this idea in my journal.  In the sketch, I knew I wanted the Rocky Mountain   range and some city elements.  So on the design board, I placed some triangles for the mountains, and placed squares with surrounding strips to represent city blocks.  The solid strips were added after the city blocks were decided on.  


Working from the top, I broke the elements down into sections to sew.   The first section was the mountain range on a white background.  I will thread paint the snow caps before sandwiching together, but to apply them onto the background, I used glue stick, used dryer sheets for stabilizers, and machine applique techniques.  Layering from furthest to closest,  I sewed down the furthest mountain using a zigzag stitch, then laid down the next mountain until finally the closest mountain was stitched.  They look like they are floating in the air, which is fine to me, they look this way sometimes when the weather is foggy or snowy.
 The next section was the grassy/water section. There are valleys and meadows with reservoirs and lakes around.  I sewed these strips together in a staggered fashion so no seams would match.  
The hardest section was the bottom section which represents the city and streets.  The solid strips break up the city blocks.  I moved these pieces around quite a bit until I was pleased with the layout, then sewed them into row/blocks.  

Again, trying not to match any seam sections so that it can look as scrappy as possible.  These sections were sewn together then, squared up with a rotary cutter.  Now, I am contemplating the quilting and backing.   I will not bind the quilt traditionally as I don't want a bound edge even if it were pieced to match the different colored edges.  I will sew using the pillowcase method, then quilt the top.   For now, it's hanging on my design board.   My DH is patiently waiting for the outcome and I hope to have it ready by his Birthday in a month.  This piece measures 24" almost square and will hang in his work place.   It looks similar to the other improv pieces I've done and I would say I've exhausted this technique and want to move onto other techniques.  
DS is coming in today so we can spend time together.  It will be so nice to have him stay with us.  He is wanting me to finish the Blue Sapphire quilt so he can hang it in his place.  Since my foot has been bothering me, I haven't done much sewing/quilting in the past 3 or 4 days.  Seems longer, but I know I should rest it.  :o)


Journal mini quilts

                                                                         "Beach Glass mini" Journal quilts are those works of art ...