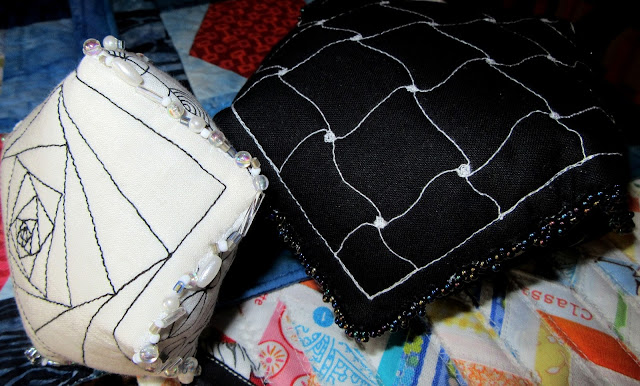
I checked out this book from our public library. After opening to the first few pages, I knew this was going to be a great beginner's approach to zentangling a quilted project. The tangled doodles in one chapter are easy and fun to practice. The small projects to apply the tangles are easy and can be completed in hours using the step by step instructions. I was intrigued by the biscornu, however instead of making a pin cushion, I stuffed the center with pebbles and poly beads to make it a weight to use in my sewing room. So, how are these made? Biscornu is a french word roughly translated to irregular shape. They are traditionally made with aida cloth and cross stitched with elaborate patterns. However, when I saw these on the cover of this book, I just had to find out if it was something I wanted to do.
Four squares are cut 4" for the white one and 6" for the black one. Layer 2 solid color same size squares on top of a batting/wadding square. Sew all around leaving an edge open to turn right side out. Layer the last pair of same size squares right sides together on top of another batting/wadding square. Sew around all edges leaving an opening and turn right sides out. Sew openings closed and iron lightly. You can choose to eyeball your design or draw directly on top of the solid color sandwich for your tangled stitching. Using a contrasting thread, sew your design. Just remember to use a light handed pencil line, or use a disappearing marking tool. I chose to eyeball my designs. To get the irregular shape, you mark the center edge line of each side, so the 4" is marked at the 2" center on all 4 sides. Now with wrong sides together, hand sew one corner to the center mark taking small tight stitches. This will make a corner, so turn the piece and sew the next edge from the center mark to the next corner. Keep going around the piece until you come to the last 2 edges to sew closed. Stuff with your preferred materials. Sew the edges closed. Your stitches will be visible, but you can use a decorative thread to show off the stitches, or cover them with trims or beads.
To finish, I added beads which are hand sewn to all the edges. Now I use them as paper weights and book weights in my sewing room so I never lose my place in a book or pattern again.


.jpg)
No comments:
Post a Comment