Wednesday, June 12, 2013

Rhodie show - June in Bloom

On entering Harlow Carr gardens, you are immediately greeted by splashes of color and drama.   I couldn't resist these beautiful Alliums or purple koosh ball flowers (as I call them). 
Onward through the kitchen garden, past the wildflower meadow, resisting the urge for a coffee in the garden tea room. 
 
No, my mission was to see the Rhodies in full bloom.


Last but not least, I saw this one but didn't see a Horti-tag on it and have no idea what it is.  If you know, please leave a comment.  Isn't it beautiful, though.  They look like little umbrellas.
 
I hope you enjoyed my Rhodie show.  Let's see what's in bloom in the next couple months.  


YoYo Quilt - Use up your scraps


My scrap bag has gotten out of hand.  It is enormous and one sure way to use up those scraps is to make a scrappy quilt.  One patch patterns are not only beautiful, but easy.  I've decided on making a YoYo quilt or coverlet. You don't have to calculate or even guess how many yoyo's you need for this type of quilt.   No need to go to the fabric store and find yards of fabric that all matches and spend hundreds of dollars.  Just pour through your scrap bag(s), cut some circles and start sewing.   One of the easiest quilts to make is a yoyo quilt.  It involves just one simple shape, a circle, any size you want.  However, once you've decided on a size, cut all your circles the same.  Using a quarter inch seam and a running stitch, sew around the raw edge whilst pulling tightly.  You don't need to purchase the clover yoyo maker either.  I have to say, I bought 2 different sizes of this gadget.  They work fine, but the better gadget to buy is the multi-sized acrylic circles.  These make marking or rotary cutting fast and easy.    After you've made about a thousand of these or more,  join them together where they touch each edge until you've used them all up or it has grown to the size you require.  There's no backing, no wadding or batting, no binding, and no quilting.    I dare say, it's really NOT a quilt at all.   Maybe you love to sew or keep your hands busy, but have never made a quilt before.  This is easy enough for the very basic beginner.   Give it a try, make a few and join them together to make a table runner or some mug mats to see if you like them.  You can find books on YoYo's and what to make with them.  

Tuesday, May 21, 2013

Meatloaf

I have an affinity for meatloaf.  Not the rock singer, although I do like his music.  Meatloaf, to me, is the penultimate of down home comfort food.  A nice thick slice of meatloaf and a dollop of garlic mash potato and various greens is my idea of the perfect dinner.   This is what Wikipedia says about meatloaf:  The meatloaf has European origins; meatloaf of minced meat was mentioned in the famous Roman cookery collection Apicius as early as the 5th century.[2] Meatloaf is a traditional German and Belgian dish, and it is a cousin to the Dutch meatball. American meatloaf[3] has its origins in scrapple, a mixture of ground pork and cornmeal served by German-Americans in Pennsylvania since Colonial times.[3] However, meatloaf in the contemporary American sense did not appear in cookbooks until the late 19th century. 

My mother used to make meatloaf.  I remember it as being too mushy with green pepper, onions, eggs, white soft bread crumbs and cheap minced beef.  I don't remember it being very flavorful, however I am sure she added salt and ground pepper.  It was mushy in that it never set and would fall apart when you sliced it.  It was tolerable, and certainly better than the other meals she prepared like stuffed overcooked cabbage, stuffed green peppers, or mushy butternut squash.  Shortly after I married my DH, I had to try and make my own meatloaf.  I tried many recipes for meatloaf, but I wanted to make it my own.  So, after many years of practice, I have to say this is my best meatloaf and I'd like to share it with you here.   Bon Appetit  :o)

Sandy's Meatloaf
1 lb. minced (ground) lean beef or ground turkey breast
1 lb. minced (ground) pork
1/4 cup minced dried white onion
2 TBSP. Worcestershire sauce
2 TBSP. Tomato paste
1 egg
1/4 cup dried bread crumbs or crushed unflavored croutons
2 cloves crushed garlic or 1 tsp. garlic powder (not garlic salt)
1 tsp. salt
1/2 tsp. ground black pepper
1 tsp. Italian herb seasoning (no salt added)
1/3 - 1/2 cup ketsup

Preheat oven to 350 degrees F. 
In a mixing bowl, combine all but the ketsup.  Mix together until just combined.  Don't over mix as this will cause the meat to become tough.   Place in a glass loaf pan.  Evenly spread ketsup over the top of the loaf.  Place in the preheated oven and bake for 55-65 minutes.  Remove from the oven and cover loosely with foil for about 10 minutes.  Carefully slice the meat just over 1/4" thick.  Cover leftovers tightly with foil and refrigerate for no longer than 4 days.   Slice cold meatloaf thinly and place between bread slices for lunch the next day. 

Wednesday, May 15, 2013

On Hold

Yes, I've put everything on hold while we are getting ourselves geared up for moving house.   We've crammed every room with boxes and have started the process.  The house we are moving to is very nice and maybe a tiny bit smaller, but just the fact that it is a detatched house is enough for me.  Privacy and quiet is what we've always wanted and had until the new neighbors moved in 2 months ago.   So, we're leaving the semi-detatched and will no longer share walls with anyone!  Hoorah!  
I'm looking way back here and posting pictures of finished quilts that I promised to show.  I love this quilt.  It was so easy and fun.  Taken from the book "Tile Revival", you can find it at Amazon.com. 
I find this one so adorable.  It's a charming adaptation from the book "Pink Lemonade and Other Delights".   I loved working with all the pinks and yellows in this cheerful quilt.
Did I show a close-up of this tumbling block before?  Can't remember, so here it is.  The machine quilting on this was extremely easy!  I used a roll of paper quilting designs called "Quilting Made Easy".  I purchased the rose patterned roll from Keepsake Quilting.   No marking is involved, all you do is measure the width of your top, cut the pattern and peel the tape from the top and bottom and stick it to the middle of your quilt sandwich.  This was a continuous line design, so no stopping or matching lines, just start off in the center as you normally would.  Sew to the end of the width, tie off and come back to the center and work out to the other side.   Keep adding rows until you've completed the quilt sandwich.  The mug mats I did also used one of the roses on the paper pattern sheet.   Paper piecing is easy as well.  No marking involved, and you can use pieces or strips from your scrap bag.  It may be a little messy with paper to tear off, but it is precise.   There are a number of websites with free paper patterns available.   Enough of a break, it's back to packing boxes for me.  Have a great day :o)


Saturday, May 11, 2013

Mug Mats

At the Superior Thread website, you can sign up for their Superior University that will teach you how you can use one different thread each month and make a small project.  I've signed up and have made the first project.  The thread is Razzle Dazzle 8wt metallic used for bobbin work.  The project was to make 4 mug mats. 
 
I found using this thread in the bobbin very easy.  The top thread is Bottom Line 60wt polyester.  After sewing around the sandwich and leaving an opening for turning right side out, I chose a free motion paper pattern flower and attached it to the underside so the Razzle Dazzle showed on the top.
I am quite pleased with the results.     
The next project is thread painting with Rainbows threads.


Again, no expectations or apprehension, just go for it and I have to say, I am pleased with these results.   The look of these threads are quite impressive.   I am convinced that these threads are a better choice for embroidery and quilting.  They have a sheen and vibrancy to them and they are very easy to sew with.   Next time we will be making a pincushion using King Tut egyptian cotton threads.    Check out the Superior Threads website and see the projects everyone has made in the program.  Click on University and show and tell.   So far, I've learned more about these threads and would use them again and again. 
 

Wednesday, March 20, 2013

Not Again....


I don't believe it....it's snowing.  It's quite abnormal for Britain to get so much snow in March.  Ah, well another day indoors.  I now have the time to catch up on some UFO's since I'm not going out in the snow.  


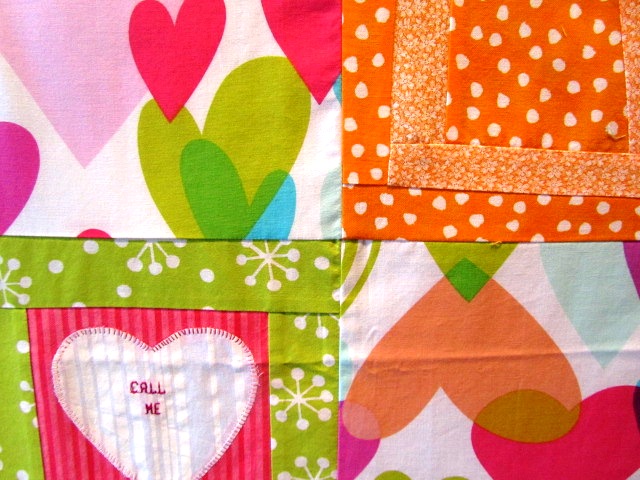
Remember this one?  It's been 5 years, yep, snagged this one way down deep in the UFO basket.  It's nearly there.  I just want to add another border all around.  Top will read "Be My" and the bottom will read "Valentine".  The side borders will be either piano keys or just plain strips.  I will dig out the rest of the fabrics used in this and see what is left over. 


I really do like these colors even though it looks
pretty wild at this stage.  As you can see it isn't
even ironed.  It has been folded and refolded to
and from the basket over those 5 years, but it
will hang here for a while then get ironed when
I'm ready to add the border.  I will use Tonya's
book again to do the lettering.    In my quilt process I work out every step in my mind and at this stage I  have already decided the quilting stitch pattern.  

On Monday we had some snow and I stayed home and made Pasties and Pulla (Finnish braided sweet bread) for DH and DS.   Being a native of Michigan with a Finnish husband, I learned early how to make these Pasties.  In case you have never made one or tried one, I am sharing my recipe with you so you can enjoy their unique taste.

Pasties
For the Crust: you can make your favorite pie crust recipe.  This one is taken from a Finnish cookbook. 
3 cups all-purpose flour
1 1/2 tsp. salt
1 tsp. baking powder
1 cup vegetable shortening or lard
1 egg
1 Tbsp. vinegar
ice cold water
For the Filling:
4 medium potatoes or 6 small , pared and diced
1 cup carrot, pared and diced
1/2 cup onion, minced
2 tsp. salt
1 tsp. ground black pepper
2 pounds ground chuck beef, or diced round steak

Mix flour, salt and baking powder.  Cut in lard until the mixture resembles coarse crumbs.  Combine egg, vinegar and 3 Tbsp. ice water, sprinkle over the flour mixture; blend.  Add ice water until mixture holds together in a ball.  Roll 6 ovals out to the size of a dinner plate.  Combine filling ingredients.   Mound 1/6 of the filling on one half of each round of dough.  Dot top with a little butter.  Fold other half of dough over and seal edges.  Bake at 400 degrees for 20 minutes.  Reduce temperature to 350 and bake another 20 minutes.  Serve hot with ketsup or beef gravy.  Makes 6 pasties.  Wrap tightly in foil and place in freezer zip bags to freeze for up to 1 month.  Thaw in the refrigerator overnight and reheat in the oven.   

Wednesday, March 6, 2013

Pincushion - Easy How To

Reduce, Reuse, Recycle...this is the objective.  My DH and I have been married for 31 years and since the beginning we have recycled glass bottles, tin, aluminum, newspaper, magazines, cardboard, batteries, cooking oil, plastics and lawn waste.  It's the responsible thing to do. 
Lately I've been making fabric bags to use at stores to reduce the use of plastic bags.  They fold up and fit nicely in my purse.  There are free patterns available online to make your own.  I use this pattern for a general use bag.  There are also loads of purse and bag patterns here

Pincushion How To:
 

This pincushion is easy to make and uses a plastic lid from a mayonnaise jar or peanut butter jar and any scraps of fabric, buttons and trims you have laying about.  I also weight the bottom with small rocks to give it some stability.    Hope you will give this a try.


1.  Wash and dry a plastic jar lid.  Place on top of freezer paper or tracing paper and draw a circle at least twice the size.  This is the pattern for the fabric padded top. 
2.  Cut out the circle and place on your fabric scrap.  Iron shiny side down or pin in place and cut out the circle. 

3.  Remove paper and sew a running stitch around the entire circle edge.  Draw up slightly and stuff firmly with polyfil stuffing, wool or cotton batting.  Draw up the thread and secure firmly. 
4. You may wish to cover the lid bottom and sides with felt.


4.  Using hot glue, glue small stones in the bottom of the lid.  Place more hot glue on top of the stones and around edge.  Place the stuffed ball on top with the raw edges down.  Hold in place for a few seconds.


5.  Use trims to decorate the sides of the lid.


6.  Enjoy your new pincushion  ;o) 


Saturday, March 2, 2013

Now for something completely different....


Just for inspiration.  These were all taken by my son while visiting York. 


Stick a Needle in your Eye or Runs with Scissors

 What are these old sayings?  Stick a needle in your eye?  Ooouch!  I take it as your needles need a place to be (and not in the eye).  A ne...